http://www.dell.com/support/home/id/en/idbsdt1/product-support/product/poweredge-r230/drivers
File sometimes corrupted when downloaded, this process below make sure that the firmware file is intact.
All computer hardware and peripherals are in this category.
http://www.dell.com/support/home/id/en/idbsdt1/product-support/product/poweredge-r230/drivers
File sometimes corrupted when downloaded, this process below make sure that the firmware file is intact.
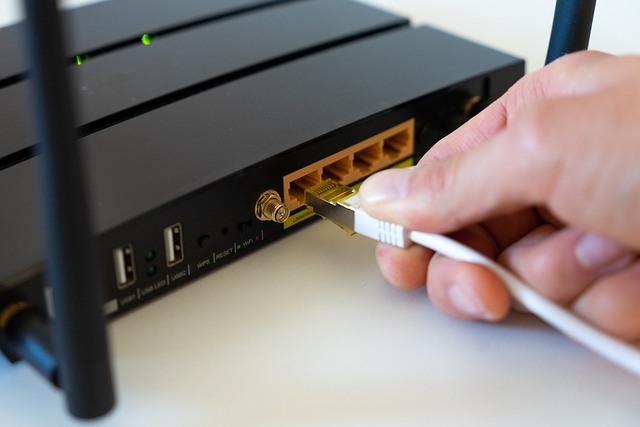
My home internet is using D-LINK DIR-600M router. This router has 4 ethernet ports for client, 1 ethernet port connected to fiber optic modem (or any other modem) and wireless connections for laptop and mobile devices.
There is 1 annoying problem with this router, sometimes my wireless clients cannot get in to the internet although it still connected to the router’s wireless network. When this is happen I disabled and enabled wireless connection and this works fine. Although this is fine with me but not for other family members, they don’t know how to disable and enable wireless, they have to restart the computer when this is happen and this is not good at all.
One that I can do to resolve this problem is to upgrade it’s firmware. I already looking for firmware for my router DLINK DIR-600M but it’s not easy. There is not much result on search engine.
7. Click upload it takes only several seconds and the upgrade process finish. The router will restart in 60 seconds.
I have been working with Motorola MC 3190 for some time and the following are the troubleshooting you need to know when working with this scanner. I write this post to remind myself if I found the same problem in the future. Any other troubleshooting and solution are welcome.
The symbol was acquired by Motorola, and later Motorola was acquired by Zebra, so if you are looking for a product of Symbol or Motorola you will end up at the Zebra website and this is normal.
There are several types of MC31xx models with configuration as table below:
Model | Radio | Displ. | Memory | Data Capture | OS | Keypads |
---|---|---|---|---|---|---|
MC3100R | WPAN: Bluetooth | Color | 128 MB RAM/ 256 MB Flash or 256 MB RAM/512 MB Flash | 1D laser scanner in rotating turret | Windows CE 6.0 Professional | 28, 38 or 48 key |
MC3100S | WPAN: Bluetooth | Color | 128 MB RAM/ 256 MB Flash or 256 MB RAM/512 MB Flash | 1D laser scanner, 2D imager | Windows CE 6.0 Professional or Windows Mobile 6.X Classic | 28, 38 or 48 key |
MC3190G | WLAN: 802.11a/b/g WPAN: Bluetooth | Color | 128 MB RAM/ 512 MB Flash or 256 MB RAM/1 GB Flash | 1D laser scanner or 2D imager | Windows CE 6.0 Professional or Windows Mobile 6.X Classic | 28, 38 or 48 key |
MC3190R | WLAN: 802.11a/b/g WPAN: Bluetooth | Color | 128 MB RAM/ 512 MB Flash or 256 MB RAM/1 GB Flash | 1D laser scanner in rotating turret | Windows CE 6.0 Professional or Windows Mobile 6.X Classic | 28, 38 or 48 key |
MC3190S | WLAN: 802.11a/b/g WPAN: Bluetooth | Color | 128 MB RAM/ 512 MB Flash or 256 MB RAM/1 GB Flash | 1D laser scanner, 2D imager or DPM imager | Windows CE 6.0 Professional or Windows Mobile 6.X Classic | 28, 38 or 48 key |
For Windows 7 and higher, you can use Windows Mobile Device Center for data management and synchronization. Windows Mobile Device Center replacing Active Sync. You can download it here:
WMDC for 32-bit machines https://www.microsoft.com/downloads/details.aspx?FamilyId=46F72DF1-E46A-4A5F-A791-09F07AAA1914&displaylang=en
WMDC for 64-bit machines is here: https://www.microsoft.com/downloads/details.aspx?FamilyId=4F68EB56-7825-43B2-AC89-2030ED98ED95&displaylang=en
Free program to scan the barcode on your windows base scanner device to be processed by any program you have. In this article we are using Datawedge version 3.3
Datawedge can be downloaded here:
https://www.barcodedatalink.com/pages/datawedge.php
You can download a free trial of Wavelink here: https://www.wavelink.com/
Clik wireless icon>manage profiles
Right Click Motorola Wireless Out of box Magic>add
Give a name of the new profile and SSID
On the operating mode: choose Infrastructure, Country Allow Any Country
Choose security mode: Legacy (Pre-WPA) if you will use WEP if not you can choose other options.
Encryption type choose open (I choose MAC address filtering in the access point)
Don’t tick Obtain Device IP address Automatically, you will need to specify the IP address individually for each scanner.
Enter your IP Address details, tick the option Set static DNS Address (Optional) if you want the scanner to recognize name instead of IP address.
Enter IP address of your DNS server, usually the same as your Domain Controller IP address.
Transmit Power: Automatic
Battery usage mode, choose CAM
To make the setting above permanent on Scanner after a cold boot, you need to export the setting by pressing the wireless icon>Options
On the drop down menu, choose Export
Click Export all Profiles, click OK
After this finish, you need to enable the radio but the radio will back disable when you do a cold boot. To make radio (WIFI) automatically enable when the scanner restarted in the cold boot, you will need to execute file fusion on.reg from here https://www.dropbox.com/s/k31olak7w4yr1a3/fusion%20on.reg?dl=0
Copy the file under \application in the scanner, double click and when asked for confirmation click YES.
The content is:
=======================================
REGEDIT4
[HKEY_LOCAL_MACHINE\Drivers\BuiltIn\WLAN]
“InitialState”=dword:00000000
“Prefix”=”WLP”
“Dll”=”PmProxy.Dll”
“Order”=dword:00000008
“Index”=dword:00000001
“DeviceArrayIndex”=dword:00000004
“WLANSlot”=dword:00000000
“Flags”=dword:00000008
“IClass”=hex(7):\
7B,41,33,32,39,34,32,42,37,2D,39,32,30,43,2D,34,38,36,62,2D,42,30,45,36,\
2D,39,32,41,37,30,32,41,39,39,42,33,35,7D,00,7B,66,38,61,36,62,61,39,38,\
2D,30,38,37,61,2D,34,33,61,63,2D,61,39,64,38,2D,62,37,66,31,33,63,35,62,\
61,65,33,31,7D,00,7B,39,34,31,30,37,44,37,30,2D,33,34,43,46,2D,34,31,39,\
61,2D,42,41,42,41,2D,31,45,35,30,39,36,31,38,35,33,34,37,7D,00,00
“FriendlyName”=”WLAN Proxy Driver for Motorola WLAN Adapter”
“SupportedStates”=dword:00000011
“InitFlags”=dword:00000000
“SlotResetOnResume”=dword:00000000
“SlotResetWait”=dword:000001F4
[HKEY_LOCAL_MACHINE\Drivers\BuiltIn\WLAN\ActivityEvents]
“PowerManager/SystemIdleTimerReset”=””
==============
For cold boot you can press key 1+9+Power simultaneously, you will need to calibrate your screen again after cold boot. Any software changes will also be wiped out unless you make it persistent. If your scanner hang and warm boot not applicable, you will need cold boot.
For warm boot on MC3190 you can press and hold power button for at least 15 seconds. You don’t need to calibrate screen and all software changes will retain. For other type of scanner like MC3090 warm boot can be done by pressing 7+9+Power keys.
Sometimes you going to need refer to the manual book. Manual book/guide for Motorola MC 3190 user manual can be found here: https://www.dropbox.com/s/9dqho7598u6fgr6/MotorolaMC3100.pdf?dl=0
Make sure your scanner on the cradle and charging, to avoid lost power during OS update
Turn on scanner, click Start, Setting, Control panel, double click system info. Take a note of your current OEM version info. Our latest version is 04.32.0004 so any version older than this will be able to be upgraded. We have been successfully upgrade from version 02.17.0006 and version 03.26.0002
Updating using program USB download ver 1.3 from Motorola
Using this program is simpler, make sure scanner MC3190 on IPL (Initial Program Loader) or Monitor mode by pressing 2 yellow button on the left and right side simultaneously and choose download from USB.
You can download USB Download V1.3 here:
Refreshing Win CE6.0 OS Installation on Scanner Symbol MC3190
The program will only refresh the OS by cleaning programs. No OS upgrade process occurred.
Use these instructions to perform clean boot and clean application volume:
OR
The update will take about 1 minute to complete. Please do not remove the device from A/C power during this time.
When there is an error with the Computer, it usually gives a startup beeps code that you can diagnose and follow up, sometimes we don’t understand what the beep means.
These beeps also known as beep POST (Power On System Test) error code.
Every BIOS manufacturer gives different beeps code and below are several leading BIOS manufacturer like AMI, AWARD, and PHOENIX.
Beeps | Error Message | Description |
1 short | DRAM refresh failure | The programmable interrupt timer or programmable interrupt controller has probably failed |
2 short | Memory parity error | A memory parity error has occurred in the first 64K of RAM. The RAM IC is probably bad |
3 short | Base 64K memory failure | A memory failure has occurred in the first 64K of RAM. The RAM IC is probably bad |
4 short | System timer failure | The system clock/timer IC has failed or there is a memory error in the first bank of memory |
5 short | Processor error | The system CPU has failed |
6 short | Gate A20 failure | The keyboard controller IC has failed, which is not allowing Gate A20 to switch the processor to protected mode. Replace the keyboard controller |
7 short | Virtual mode processor exception error | The CPU has generated an exception error because of a fault in the CPU or motherboard circuitry |
8 short | Display memory read/write error | The system video adapter is missing or defective |
9 short | ROM checksum error | The contents of the system BIOS ROM does not match the expected checksum value. The BIOS ROM is probably defective and should be replaced |
10 short | CMOS shutdown register read/write error | The shutdown for the CMOS has failed |
11 short | Cache error | The L2 cache is faulty |
1 long, 2 short | Failure in video system | An error was encountered in the video BIOS ROM, or a horizontal retrace failure has been encountered |
1 long, 3 short | Memory test failure | A fault has been detected in memory above 64KB |
1 long, 8 short | Display test failure | The video adapter is either missing or defective |
2 short | POST Failure | One of the hardware testa have failed |
1 long | POST has passed all tests |
Beeps | Error Message | Description |
1 long, 2 short | Indicates a video error has occurred and the BIOS cannot initialize the video screen to display any additional information. | |
1 long, 3 short | Video card not detected (reseat video card) or bad video card | |
Beeps repeating endlessly | RAM Problem, it could lose contact or broken RAM | |
Repeated high frequency while PC is running | CPU (Processor) Overheat | |
Repeated beeps alternating high & low frequency | Issue with the processor (CPU), possibly damaged | |
Beeps | Error Message | Description |
1-1-2 | CPU test failure | The CPU is faulty. Replace the CPU |
Low 1-1-2 | System board select failure | The motherboard is having an undetermined fault. Replace the motherboard |
1-1-3 | CMOS read/write error | The real time clock/CMOS is faulty. Replace the CMOS if possible |
Low 1-1-3 | Extended CMOS RAM failure | The extended portion of the CMOS RAM has failed. Replace the CMOS if possible |
1-1-4 | BIOS ROM checksum error | The BIOS ROM has failed. Replace the BIOS or upgrade if possible |
1-2-1 | PIT failure | The programmable interrupt timer has failed. Replace if possible |
1-2-2 | DMA failure | The DMA controller has failed. Replace the IC if possible |
1-2-3 | DMA read/write failure | The DMA controller has failed. Replace the IC if possible |
1-3-1 | RAM refresh failure | The RAM refresh controller has failed |
1-3-2 | 64KB RAM failure | The test of the first 64KB RAM has failed to start |
1-3-3 | First 64KB RAM failure | The first RAM IC has failed. Replace the IC if possible |
1-3-4 | First 64KB logic failure | The first RAM control logic has failed |
1-4-1 | Address line failure | The address line to the first 64KB RAM has failed |
1-4-2 | Parity RAM failure | The first RAM IC has failed. Replace if possible |
1-4-3 | EISA fail-safe timer test | Replace the motherboard |
1-4-4 | EISA NMI port 462 test | Replace the motherboard |
2-1-1 | 64KB RAM failure | Bit 0; This data bit on the first RAM IC has failed. Replace the IC if possible |
2-1-2 | 64KB RAM failure | Bit 1; This data bit on the first RAM IC has failed. Replace the IC if possible |
2-1-3 | 64KB RAM failure | Bit 2; This data bit on the first RAM IC has failed. Replace the IC if possible |
2-1-4 | 64KB RAM failure | Bit 3; This data bit on the first RAM IC has failed. Replace the IC if possible |
2-2-1 | 64KB RAM failure | Bit 4; This data bit on the first RAM IC has failed. Replace the IC if possible |
2-2-2 | 64KB RAM failure | Bit 5; This data bit on the first RAM IC has failed. Replace the IC if possible |
2-2-3 | 64KB RAM failure | Bit 6; This data bit on the first RAM IC has failed. Replace the IC if possible |
2-2-4 | 64KB RAM failure | Bit 7; This data bit on the first RAM IC has failed. Replace the IC if possible |
2-3-1 | 64KB RAM failure | Bit 8; This data bit on the first RAM IC has failed. Replace the IC if possible |
2-3-2 | 64KB RAM failure | Bit 9; This data bit on the first RAM IC has failed. Replace the IC if possible |
2-3-3 | 64KB RAM failure | Bit 10; This data bit on the first RAM IC has failed. Replace the IC if possible |
2-3-4 | 64KB RAM failure | Bit 11; This data bit on the first RAM IC has failed. Replace the IC if possible |
2-4-1 | 64KB RAM failure | Bit 12; This data bit on the first RAM IC has failed. Replace the IC if possible |
2-4-2 | 64KB RAM failure | Bit 13; This data bit on the first RAM IC has failed. Replace the IC if possible |
2-4-3 | 64KB RAM failure | Bit 14; This data bit on the first RAM IC has failed. Replace the IC if possible |
2-4-4 | 64KB RAM failure | Bit 15; This data bit on the first RAM IC has failed. Replace the IC if possible |
3-1-1 | Slave DMA register failure | The DMA controller has failed. Replace the controller if possible |
3-1-2 | Master DMA register failure | The DMA controller had failed. Replace the controller if possible |
3-1-3 | Master interrupt mask register failure | The interrupt controller IC has failed |
3-1-4 | Slave interrupt mask register failure | The interrupt controller IC has failed |
3-2-2 | Interrupt vector error | The BIOS was unable to load the interrupt vectors into memory. Replace the motherboard |
3-2-3 | Reserved | |
3-2-4 | Keyboard controller failure | The keyboard controller has failed. Replace the IC if possible |
3-3-1 | CMOS RAM power bad | Replace the CMOS battery or CMOS RAM if possible |
3-3-2 | CMOS configuration error | The CMOS configuration has failed. Restore the configuration or replace the battery if possible |
3-3-3 | Reserved | |
3-3-4 | Video memory failure | There is a problem with the video memory. Replace the video adapter if possible |
3-4-1 | Video initialization failure | There is a problem with the video adapter. Reseat the adapter or replace the adapter if possible |
4-2-1 | Timer failure | The system’s timer IC has failed. Replace the IC if possible |
4-2-2 | Shutdown failure | The CMOS has failed. Replace the CMOS IC if possible |
4-2-3 | Gate A20 failure | The keyboard controller has failed. Replace the IC if possible |
4-2-4 | Unexpected interrupt in protected mode | This is a CPU problem. Replace the CPU and retest |
4-3-1 | RAM test failure | System RAM addressing circuitry is faulty. Replace the motherboard |
4-3-3 | Interval timer channel 2 failure | The system timer IC has failed. Replace the IC if possible |
4-3-4 | Time of day clock failure | The real time clock/CMOS has failed. Replace the CMOS if possible |
4-4-1 | Serial port failure | A error has occurred in the serial port circuitry |
4-4-2 | Parallel port failure | A error has occurred in the parallel port circuitry |
4-4-3 | Math coprocessor failure | The math coprocessor has failed. If possible, replace the MPU |
What is a QWERTY keyboard? – You’ve probably asked yourself, “What is a Qwerty keyboard?” and wondered why people still use it today. This article will explain how it works, the advantages it has over other keyboards, and why people still prefer it. You’ll also learn how to use a Qwerty keyboard to write your own articles or make presentations. Read on to find out! But first, let’s examine the history of the keyboard.
The QWERTY keyboard layout is a common keyboard design for Latin script alphabets. The design was based on the Sholes and Glidden typewriter layout and sold to E. Remington and Sons in 1873. The layout has been a popular choice for many years, and was first used on a typewriter sold in the U.S. in 1909. The QWERTY keyboard layout is often referred to as the “standard” keyboard layout.
The QWERTY keyboard layout was first developed in the 1860s by Christopher Latham Sholes and his business partners, Samuel W. Soule and Carlos Glidden. The Q key was positioned in the corner, making the most commonly used letters easy to find. The vowels were close together to prevent jamming. A modern QWERTY keyboard has a number pad located on top. A Q key in the corner allows you to press the letters you want to write more easily.
The QWERTY keyboard layout is a standard design for typewriters using Latin-script alphabets. This layout was based on the Sholes and Glidden typewriter design, which was sold to E. Remington and Sons in 1873. Today, it is the most popular typewriter layout used worldwide. Its design was adapted by a number of different companies to meet the demands of the typing public.
The QWERTY layout was originally invented for typewriters in the 1870s, by Christopher Sholes. The first six letters of the alphabetical line – A, Q, R, T, and Y – are the basis for the layout. Sholes redesigned the typewriter’s keyboard to prevent letter jams. Early typewriters jammed frequently when adjacent letters were pressed at the same time. The QWERTY layout focuses on spacing the letters so that they are not in close proximity to each other.
The QWERTY keyboard layout is one of the most widely used computer keyboards. Its layout puts commonly used letters in easily accessible places to make typing easier. The QWERTY keyboard was adapted from a typewriter. Because typewriters were mechanically slow, it was important to separate commonly used letters to prevent jamming. In 1873, Sholes and Glidden sold the layout to E. Remington and Sons. In 1878, the company released the Remington No. 2 typewriter, which popularised the QWERTY keyboard layout. Since then, the QWERTY layout has been widely used and has become the standard for typing.
The QWERTY keyboard was originally designed for English language use. In many countries, accents are not used on the standard US keyboard layout. Some countries, such as Canada, have adopted a different keyboard layout. For example, the French keyboard uses a different layout. The standard US keyboard layout on MacOS includes “US-International” keyboard mapping. Similarly, most PC keyboards in Europe have the AltGr key, which replaces the right Alt key and allows the user to type most common diacritics in the region where the keyboard was sold.
There are some downsides to using a Qwerty keyboard, but overall, it is the most commonly used keyboard. Many people feel comfortable using it, and the lack of difficulty in learning a new keyboard makes it a good choice for many users. In addition, Qwerty keyboards can get some tasks done well, and some typists even have high word per minute scores. But there are also some downsides to using a Qwerty keyboard.
One major drawback to using the QWERTY keyboard is its infrequent use of the home row, the column of letters beginning with the letter A and ending with the letter L. Because the home row is naturally where your fingers rest, you rarely type on it. In fact, Dvorak’s simplified keyboard estimates that you use it for less than 20 percent of the time. Because it is not ergonomically sound, QWERTY has some serious disadvantages.
If you’re looking to switch keyboard layouts for your computer, you may be wondering whether the QWERTY keyboard and its alternatives are the best choice. In addition to the ergonomic benefits of these alternatives, they also pose some challenges for productivity. Here’s a look at the differences between QWERTY and Dvorak. Ultimately, which layout is best for you depends on your specific needs and preferences. But whether QWERTY is better or worse for your productivity depends on the type of tasks you do.
Although there are a number of alternative keyboard layouts, the QWERTY layout is still the most common. People who need to type faster may find it difficult to adjust to other layouts and must invest time to learn a new keyboard. While Dvorak’s layout is widely accepted, it requires some effort to learn. Using this keyboard layout can make you faster than you would with QWERTY. However, if you have a preference for Dvorak, you may want to give it a try today.
How laptop screens are measured – Laptops display commonly range from 11.6 to 17 inches. Some people like game players love a bigger screen (17 inches) and other comfortable with 13 inches display, usually top management that want a smaller and lighter laptops.
Desktop computer monitors are offered in sizes ranging from 13 to 43 inches. Some users may employ a TV as a monitor, with screen sizes of 84 inches or more. While technology plays a part, generally speaking, the greater the monitor size, the higher the cost.
For desktops and laptops, the monitor or screen is measured from the top left-corner to the bottom-right corner, in inches.
Measurement of the screen on the laptop
Physically measuring the screen of a laptop computer allows for the determination of the display’s dimensions. To take a measurement using a tape, begin at the top-left corner and pull the tape in a diagonal direction until you reach the bottom-right corner. Be sure to simply measure the screen and leave the bezel, which is the plastic edge that surrounds the screen, out of your calculations.
Screen of the laptop measurement – a look at the specifications
The dimensions of the display on a laptop are typically listed among its technical specs. Check the specifications of the laptop to see if there is a part that is named “Screen,” “Display,” or something similar. In that particular section, the screen size is specified using inches. If you are still confused, you can find the dimensions of the laptop by doing a quick search online using the model number.
Knowing the monitor size of a desktop computer by measuring
Physically measuring the screen of a desktop computer monitor is the only way to determine the monitor’s dimensions. To take a measurement using a tape, begin at the top-left corner and pull the tape in a diagonal direction until you reach the bottom-right corner. Be sure to simply measure the screen and leave the bezel, which is the plastic edge that surrounds the screen, out of your calculations.
Knowing the monitor size by looking at the model number
The dimensions of the screen are indicated by the model number of the monitor, which includes those dimensions. For instance, the model number S201HL could be assigned to an Acer screen that measures 20 inches. The size of the monitor is indicated by the “20” that comes after the “S.” A model number will typically begin with one or two letters, then be followed by a series of numbers. The size of the monitor is often denoted by the first two numbers that follow the letters in the model number. If you are still unclear, all you need to do is do a quick search online using the model number to obtain the specific dimensions.
Besides the screen size, refresh rate also important for the display to make a better picture, and movements, especially for gamers and animators. Commonly is 60hz for refresh rate but in high end laptop is has 144hz refresh rate.
Conclusion:
The bigger the laptop screen usually identic with higher resolution which is good because it make the picture smoother. You can measure the laptop display and desktop monitor diagonally without measuring the plastic part.
144hz laptop – 144hz is a refresh rate that is used in many high end laptops. This rate is higher than what is typically used in laptops, which is 60hz.
Refresh rate is the number of times per second the display refreshes. It is measured in hertz (Hz) or kilohertz (kHz). Most LCDs use 60hz refresh rate, which is the standard refresh rate for most laptops. The refresh rate determines how many times the screen can be updated in one second.
A higher refresh rate helps with motion blur. Motion blur is when your eyes can’t see a fast moving object clearly because they are still.
You’d be surprised at how much of a difference it makes. I’ve been using a 144hz monitor for the past year and it’s been great. You’ll notice the difference when watching movies, playing games, or even just surfing the web.
In fact, you might not even realize you’re on a 60hz display until you switch to a 144hz display.
I think it’s more about the ability to display smooth motion. When the refresh rate is lower, you get more jittery movement as the image is being refreshed. At higher refresh rates, there’s less jittery movement.
I have a 4K TV that has a refresh rate of 144 Hz, and it looks very good. I think the same applies to monitors.
When our eyes are comfortable with the display of the laptop we will be able to stay longer on any activities in front of a laptop.
The first thing you’ll need to do is check your laptop’s specifications. There should be a sticker on the bottom of the laptop that will tell you what the maximum refresh rate is.
You can also go to your local computer store and ask them about the highest refresh rate your laptop supports. They may have a list of laptops with the highest refresh rates.
There are two ways to figure out what your current refresh rate is. One is to open up your laptop and look at the sticker on the bottom. The other is to download the DisplayFusion software from the official website. It’s free, but you’ll need to download it from the website https://www.displayfusion.com
Once you’ve downloaded and install the software, you’ll need to open it up and click on “Monitor configuration”
If you’re using Windows, you’ll see the refresh rate under the “Display” section.
The above picture shows 40hz refresh rate, but mostly it shows 60hz, I am not sure what causes this. When your laptop has 144hz refresh rate it will shows so.
The laptops that has 144hz display refresh rate is Alienware, and Acer Helios 500, these are gaming laptop that has all the necessary features to support your gaming activity. Like processor, memory, storage, display, keyboard and the colling system.
How to check computer specs – Sometimes we need to check our laptop or desktop computer specification for upgrade or troubleshooting purposes. In this post, I am using windows 10 and some utilities that can be used on various operating systems.
For example:
There are several ways we can check however this is my favorite, right-click on the start button, and click system, you will see the computer specification as below:
Device name is your computer name, you can change/rename this.
Processor, this is your processor name, type, and speed.
Installed RAM is your RAM capacity.
You can also check your windows edition, version, and installed date in case you want to rebuild your computer software.
To know the installed RAM capacity we can use the above steps but we cannot find the information about type and frequency. If you need this information I suggest you using CPUZ https://www.cpuid.com/softwares/cpu-z.html
After downloading and installing CPUZ open the program and click SPD tab. As you can see below on slot #1 my laptop RAM’s type is DDR3 with speed 800Mhz, and the size is 4 GB. you can also find the manufacturer, production date, and many useful information about the RAM.
You can also the other RAM slot information by clicking the down arrow next to Slot#1
For graphics card information I also use CPUZ, as in the picture below, my Lenovo Thinkpad T430 graphics card is Intel HD Graphics 4000 which is standard.
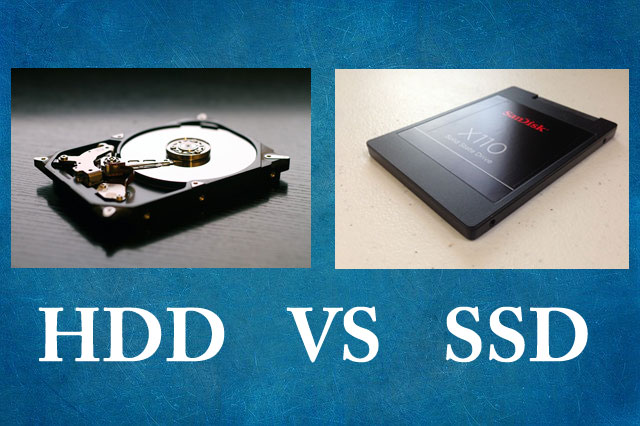
You can check by typing dfrgui on search column and press enter, it will show whether its Solid State Drive (SSD) or Harddisk (HDD).
You also use powershell command to check this, type Powershell on the search bar and press enter. You will see the Media Type whather its SSD or not.
Using CPUZ program, we can see below that my motherboard model is 2349CTO
What model of computer do we have
Using system information from Windows we can also similar laptop specs information
You see that there are several ways we can use to check the computer or laptop specification.
Alienware 15 R4 – Small but mighty, the Alienware 15 gaming laptop is designed for serious gamers on the go. With its powerful NVIDIA GeForce GTX 1060 graphics and i7-8750H processors, you’ll be able to tilt the game in your favor.
The Alienware 15 supports DDR4 RAM with a capacity of 8GB upgradeable to 32GB and acceptable speeds from 2400 MHz to 2667 MHz. This enables the computer to give great experiences while also providing a roadmap for upgrades.
The Alienware 15 strikes the ideal mix between power and mobility, and its construction benefits from the use of premium materials, which contribute to the product’s higher overall quality. Copper enables efficient heat management, which in turn enables maximum performance; magnesium alloy assures structural rigidity; anodized aluminum offers protection; reinforced steel contributes to overall tactile comfort.
Alienware 15 r4 drivers are available here https://www.dell.com/support/home/en-us/product-support/product/alienware-15-r4/drivers
The price of the Dell Alienware 15 r4 is $1,399.
Alienware 15 r4 i7 8750h intel processor is an excellent processor. It has a 6-core/12-thread design and runs at 2.2GHz.
Alienware 15 r4 manual is available here https://www.dell.com/support/home/en-us/product-support/product/alienware-15-r4/docs
Alienware 15 r4 ram is 8GB DDR4 2400 Mhz
Alienware 15 r4 battery replacement
If you’re having trouble charging your Alienware 15 R4, it might be time to replace the battery
Alienware 15 r4 cooler system is intended to keep the laptop cool when being used.
The system has a greater maximum thermal design power (TDP) support, it can manage a higher total wattage for the components that are already inside it, which enables it to perform at a higher level. Because the ventilation system as a whole has been updated, your system is still cools even when subjected to intense graphics pressure.
Alienware 15 r4 ssd upgradeable
Because solid-state drives (SSDs) do not include any moving components, they are able to load your game more quickly, they produce almost no noise, and they have a lower rate of failure. If your system is more quiet, you will be better able to pinpoint every step that your adversary takes.
Alienware 15 r4 weight is 9.9 lbs
The Alienware 15 r4 keyboard is like no other.
With the latest version of the Alienware TactX keyboard, n-key rollover is now supported, which enables over 108-key commands for the highest possible number of operations in one minute. It is the only keyboard found on a laptop with a key travel of 2.2 millimeters, which enables a speedy response to each keystroke. In addition to this, it is strengthened with a steel rear plate to provide rigidity and uniform feedback, and the manufacturer guarantees that it will continue to operate normally for up to 10 million keystrokes.
Using the new and enhanced AlienFX, you can give your laptop a look that is more tailored to your preferences. AlienFX lighting is now available on over 130 titles, and users have the opportunity to develop and download their own custom themes. The lighting was designed with optimal RGB-LED capabilities and AlienFX lighting.
Alienware 15 r4 ports:
Two USB Type-A (USB 3.1 / USB 3.2 Gen 1), One Thunderbolt 3 (Supports DisplayPort) One USB 3.1 / USB 3.2 Gen 2, One HDMI 2.0, One Mini DisplayPort in total. Check our Alienware 17 Inches laptops post.
Razer Blade 15 – The Razer Blade is a high-end laptop made by Razer. It is a gaming laptop that is made for people who want the best performance possible. It has a lot of features that people look for in a gaming laptop, such as a high-resolution display and a powerful processor.
The Razer Blade has a design that is similar to other Razer laptops. It has a design that is made for gamers. The laptop is black and silver with a matte finish. It also has a red light bar that goes along the side of the laptop. The laptop also has a keyboard that is made for gaming. It has keys that are made for gaming and not for typing. The keys are a little small but they are comfortable. The keys have a nice feel to them and they do not have any sticking issues.
More Strength. The 10th Generation Intel Core i7-10750H processor offers the highest possible level of performance, with a maximum turbo frequency of up to 5.0 GHz and six cores that are supercharged: The visuals provided by the NVIDIA GeForce GTX 1660 Ti are a lightning-quick booster for the games that are most played today.
More Frames: Incredible performance combined with the lightning-quick 120Hz 15.6 inch display “A Full HD display with minimal bezels contributes to the victory.
Slender and Condensed: Incredible performance is packed into the smallest footprint possible within the CNC aluminum unibody frame, which also manages to maintain a remarkable level of durability while being just 0.78 inches thin.
Are You Prepared To Connect? Complete with an abundance of connectivity options, such as a webcam, wireless-AC, Bluetooth 5, two times the number of USB Type-A ports, two times the number of USB Type-C ports, and more.