How to Build Webview App in Android Studio 4.0
Webview android studio ~ My notes on building Webview app using android studio 4.0 is not easy for me as I forgot all the lessons in the earlier Android Studio version. I have a source code of Webview application but when try to open using Android Studio 4.0 too many obsolete codes that has to be changed.
Finally I decided to create the Webview app using Android studio from the scratch and here is the steps.
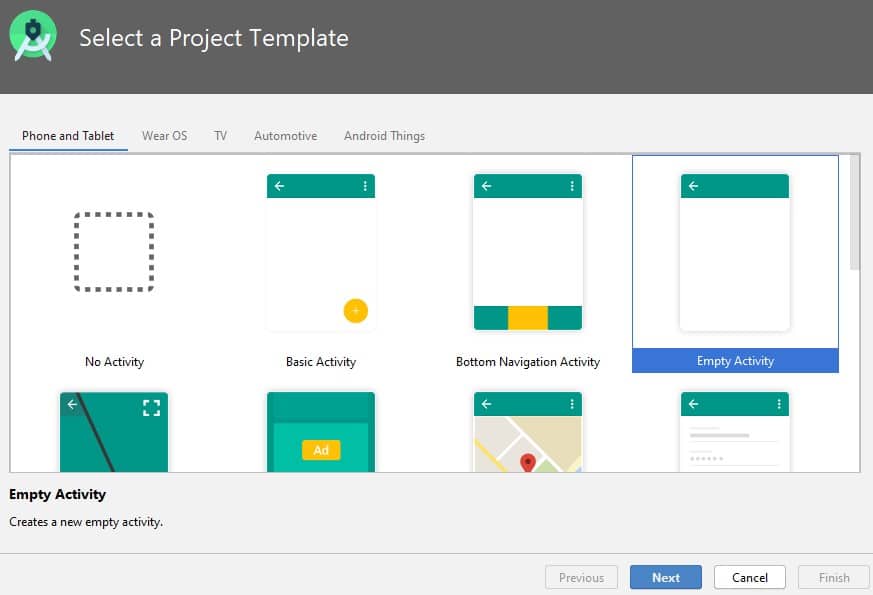
Open Android Studio 4.0 click File – New – New Project, select Empty Activity, click Next
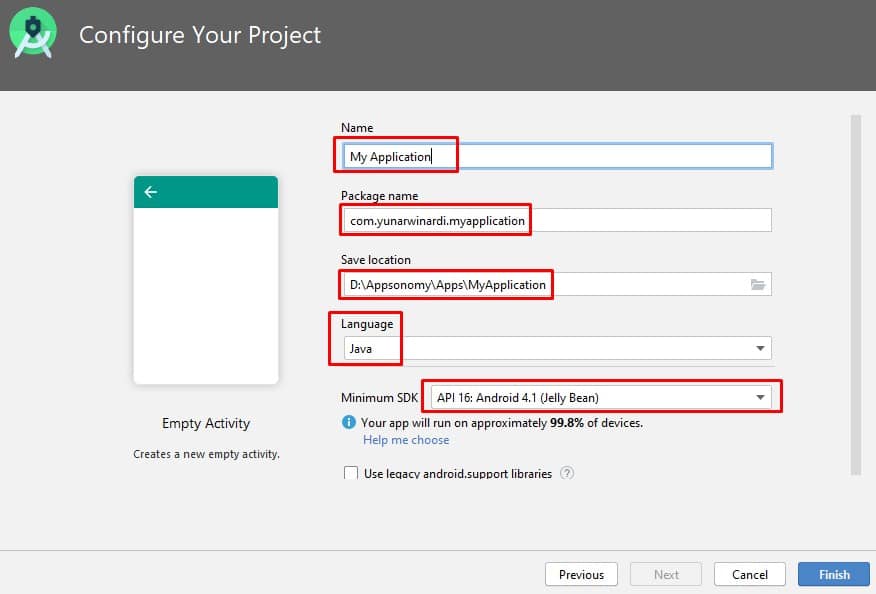
Name: Give a name for your application
Package name: you can rename as you like in the format com.yourcompany.yourapplication
Save location: Folder location of your application
Languange: you can choose Kotlin or Java, on my case I choose Java. Click Finish button.
There are 3 files we need to add a simple code: AndroidManifest.xml MainActivity under java folder, and activity_main.xml under res-layout
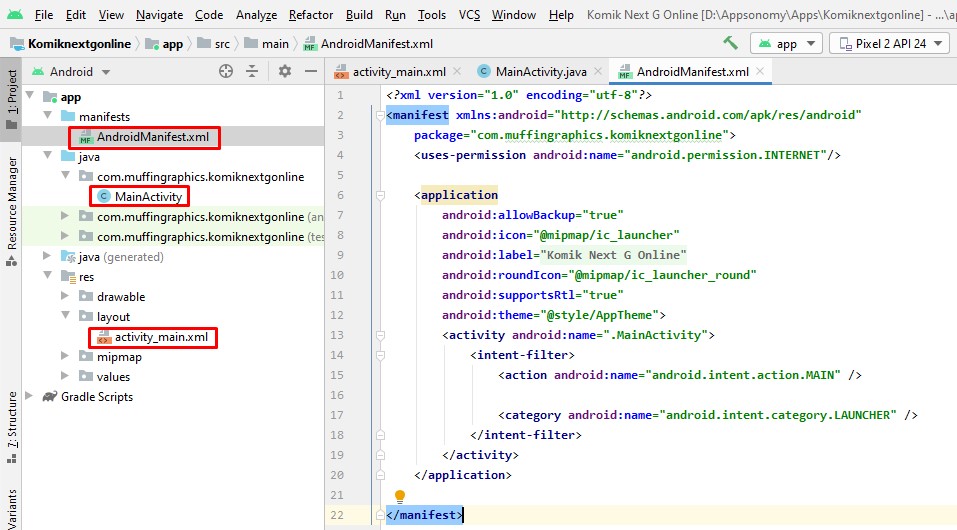
AndroidManifest.xml file
<?xml version="1.0" encoding="utf-8"?>
<manifest xmlns:android="http://schemas.android.com/apk/res/android"
    package="com.muffingraphics.komiknextgonline">
    <uses-permission android:name="android.permission.INTERNET"/>

    <application
        android:allowBackup="true"
        android:icon="@mipmap/ic_launcher"
        android:label="@string/app_name"
        android:roundIcon="@mipmap/ic_launcher_round"
        android:supportsRtl="true"
        android:theme="@style/AppTheme">
        <activity android:name=".MainActivity">
            <intent-filter>
                <action android:name="android.intent.action.MAIN" />

                <category android:name="android.intent.category.LAUNCHER" />
            </intent-filter>
        </activity>
    </application>

</manifest>
MainActivity file:
package com.muffingraphics.komiknextgonline;

import androidx.appcompat.app.AppCompatActivity;

import android.os.Bundle;
import android.webkit.WebSettings;
import android.webkit.WebView;
import android.webkit.WebViewClient;

public class MainActivity extends AppCompatActivity {
    private WebView WebView;

    @Override
    protected void onCreate(Bundle savedInstanceState) {
        super.onCreate(savedInstanceState);
        setContentView(R.layout.activity_main);

        WebView = findViewById(R.id.WebView);
        WebView.setWebViewClient(new WebViewClient());

        WebSettings webSettings = WebView.getSettings();
        WebView.getSettings().setJavaScriptEnabled(true);
        WebView.loadUrl("Your URL");
    }

    @Override
    public void onBackPressed() {
        if (WebView.canGoBack()) {
            WebView.goBack();
        } else {
            super.onBackPressed();
        }
    }
}
activity_main.xml file:
<?xml version="1.0" encoding="utf-8"?>
<RelativeLayout xmlns:android="http://schemas.android.com/apk/res/android"
    xmlns:app="http://schemas.android.com/apk/res-auto"
    xmlns:tools="http://schemas.android.com/tools"
    android:layout_width="match_parent"
    android:layout_height="match_parent"
    tools:context=".MainActivity">

    <WebView
        android:id="@+id/WebView"
        android:layout_width="match_parent"
        android:layout_height="match_parent"/>

</RelativeLayout>
By following above code on the 3 files you should able to build APK debug for test the application, happy coding.
This wraps up my post “How to Build Webview App on Android Studio 4.0” I hope it helps.
I am not an expert for the android app I just need to build WebView App for my client. Thanks.
