How To Connect Namecheap Domain To Blogger
Pacwebco.com is registered on Namecheap and uses Blogger as a free hosting service. I love this combination because it’s free hosting with world-class reliability and feature. All I need to pay is a yearly domain name renewal on Namecheap.
The steps I took when configuring this website:
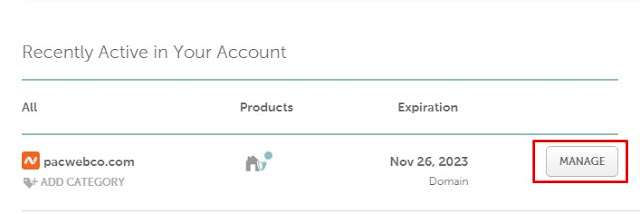
1. Open your Namecheap account and click the manage button next to your domain name.
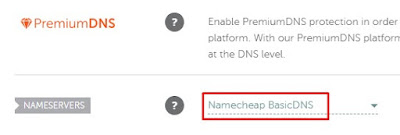
2. Make sure your Nameservers using Namecheap BasicDNS
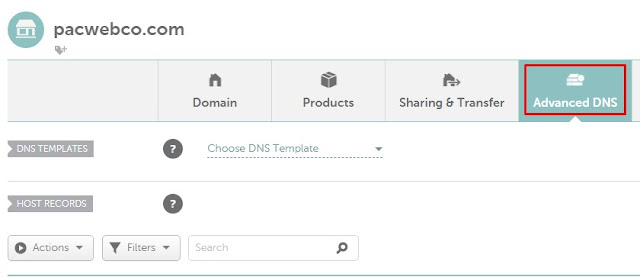
3. Click Advanced DNS
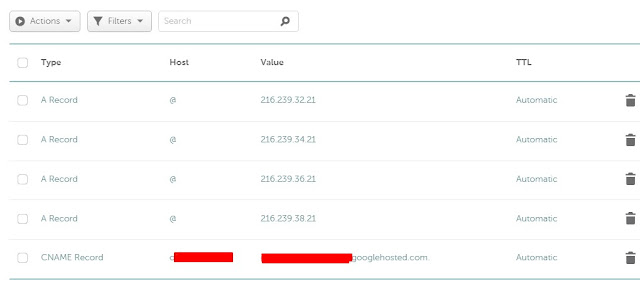
4. You will only need the following records:
Type: A Record Host: @ Value: 216.239.32.21
Type: A Record Host: @ Value: 216.239.34.21
Type: A Record Host: @ Value: 216.239.36.21
Type: A Record Host: @ Value: 216.239.38.21
Type: CNAME Record Host: xxxx Value: xxxx.googlehosted.com these record are unique to your domain and you can get this information on Blogger dashboard.
5. Open the Blogger dashboard, click settings, click Custom domain, new window will open and you need to type www.yourdomain.com click the Save button.
After click Save button you will see very important information that only show once and you need to write it down as it will need to fill in your Namecheap Advanced DNS settings.
We have not been able to verify your authority to this domain. On your domain registrar’s website, locate your Domain Name System (DNS) settings and enter the following two CNAMEs: (Name: www, Destination: ghs.google.com) and (Name: xxxxxx, Destination: xxxxxxxxx.dv.googlehosted.com). See https://support.google.com/blogger/answer/1233387 for detailed instructions.
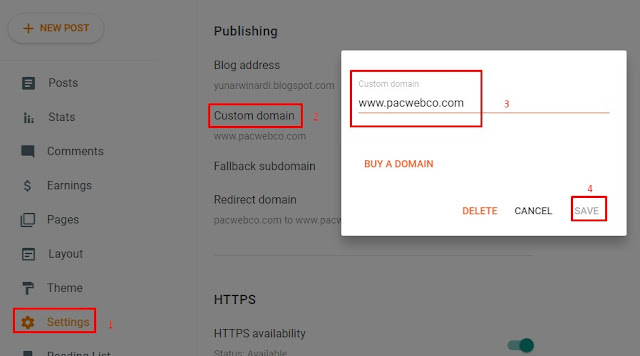
6. Back to Namecheap and finish step no 4 above using the information you just write down. (Name: xxxxxx, Destination: xxxxxxxxx.dv.googlehosted.com)
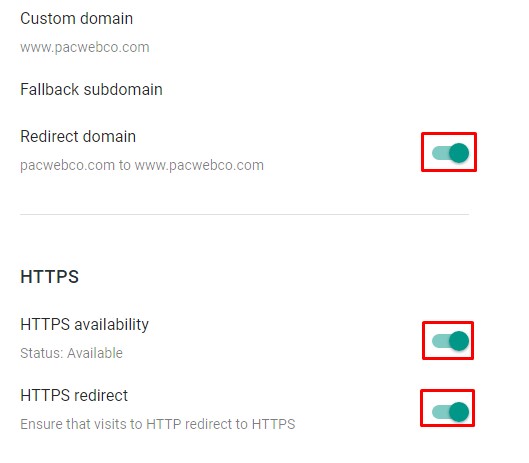
7. Back to Blogger dashboard and turn on the settings:
Redirect domain
https availability
https redirect
Check the picture below
Congratulations!
Now you have done connecting Namecheap domain to Blogger. You should able to visit your Blogger website using the custom domain you have. From xxxxxx.blogspot.com to yourdomain.com