Sometimes you need to change your IP address for some reason. Maybe you have conflicted IP address, want to connect to another network, or others. Although now mostly IP address derived from the server (DHCP), in special cases we need to add or change it manually.
Below I show you how to change IP address in Windows 10, for others version of Windows the steps are very similar to this steps.
To change IP address on your computer follow this steps:
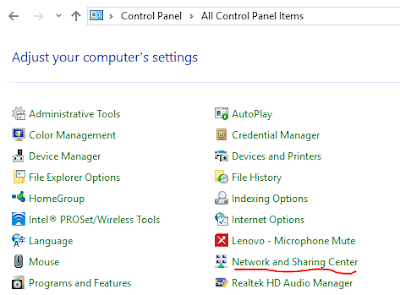
1. Open Control Panel (type control panel on the search button).
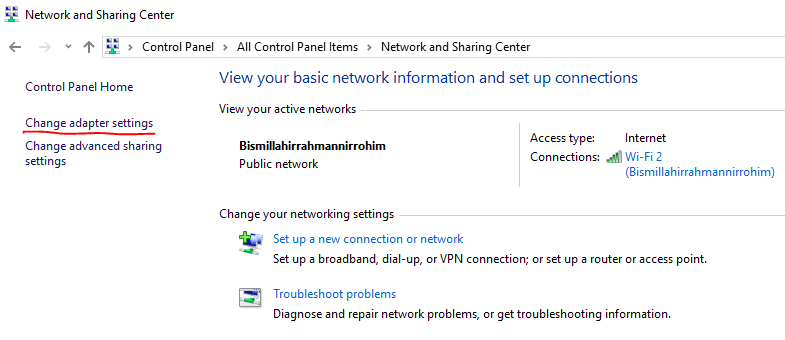
2. Click Network and Sharing Center, then click Change adapter settings
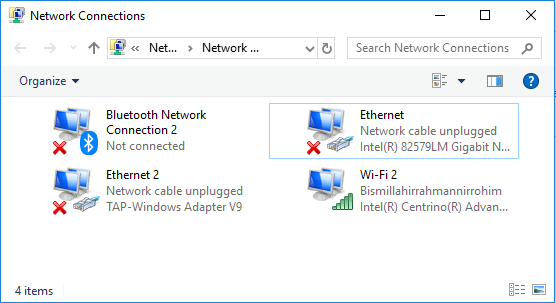
3. Click whether Ethernet if your computer is connected via LAN, or click WI FI if your computer connected wirelessly. It depends on your situation.
4. Right-click on the icon, in my case Wi-Fi 2 and click properties.
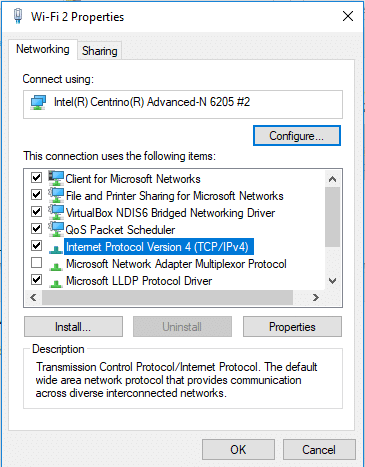
5. Double-click Internet Protocol Version 4 (TCP/IPv4)
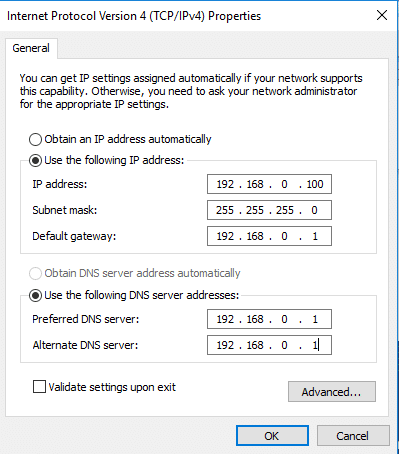
6. In my case, I am using IP address automatically from the server. If you want to change the IP address, then click Use the following IP address.
7. In the picture above I change static IP address:
IP address: Type your static IP address
Subnet mask: Mus be the same with gateway subnet mask
Default gateway: Usual your router IP address, in this case, 192.168.0.1
Preferred DNS server: Your 1st DNS server, in this case, same with gateway IP address
Alternate DNS server: Your 2nd DNS server, in this case, same with 1st DNS server.


