Table of Contents
Why do you want to move from shared hosting to Cloud hosting?
In our case, someone can access our files and insert malware files on the website, which can enable them to create an admin user to create a post with links to betting websites. We already close FTP access, add cloudflare, activate Wordfence and other measures to mitigate unauthorized access like this.
We suspect that the hacker gained access from our neighbour’s website on the same server (shared hosting) that’s why we decided to move to the Cloud plan (on the same company) for better security.
Steps required to move from shared hosting to Cloud hosting
- From Cpanel or Hpanel, backup the website (files and database)
- Download the files (1 file backup and 1 database file) to local computer.
- Delete the website from the old plan (shared hosting) so you can use the domain name in the new plan.
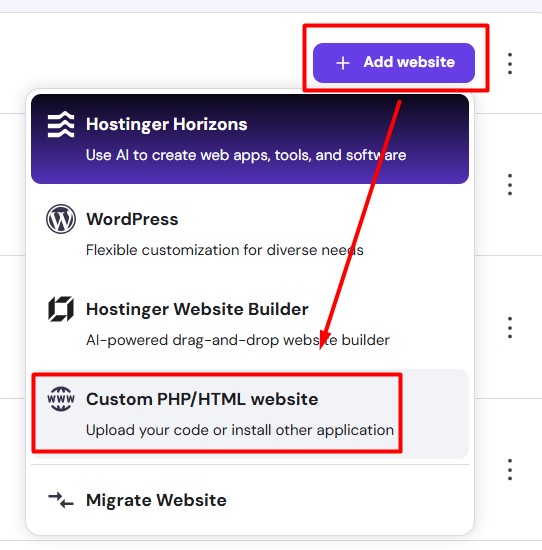
- In the new plan (Cloud plan), add website using the same domain which deleted in step 3.

- Using File Manager Upload backup file to Cloud plan.
- Extract the uploaded file to backup folder
- Move all files from the backup folder to /files/public_html/
- Create a new database, database user, and password
- Import database using database file you download on step 2
- Edit file wp-config.php and edit database name, database user, and password section match with step no 8, save the file.
The above steps will make your website run well on the new plan (cloud). I succeeded in moving 6 websites and failed on 2 other websites because it too big.
Troubleshooting when moving the websites
When your backup files are too big, mine was 11GB and 13GB the steps above will fail. You will get a 500 error code or a 403 error. This is because when restoring the file, it will not be completed correctly. To proove this, you need to extract the backup file on your local computer.
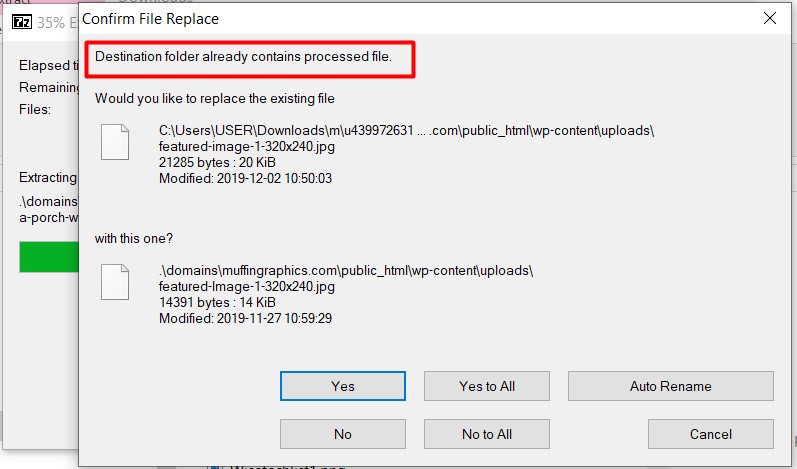
Use 7zip to extract the tar.gz file. At first, extracting it will become .tar file and you need to extract it again to make it readable in your computer.

If you found similar error like above ( Destination folder already contains processed file) on local computer, then your restore will not succeed on the hosting plan.
To make it work, you need to restore all files except the uploads folder. The uploads folder contains all images in your WordPress website, and this will be huge in size if your website already running for years.
You can use Updraft Backup plug-in to exclude the restoring uploads folder. Later, you can upload the uploads folder one by one and skip the folder with the problem.
Checkout Best Cloud Hosting Providers for Websites in 2025
Alternatively ( but I am not try this yet)
Extract all files with the message above by pressing Yes and write down the problem folder or files. After extracting, delete the problem files and re-archive all extracted files using exactly the same name. Test again by extracting on the local computer, make sure the extraction process is smooth until it finishes without error like above.
Do the steps 1 until step 10 and it should works.


